
Single Sign On (SSO) WorkOS
The Single Sign-On (SSO) feature via WorkOS is not available by default in meddevo; it must be purchased as an additional option. SSO allows you to conveniently and securely log in using your corporate account.
Note:
If you are interested in SSO, please contact our sales team at sales@meddevo.com. After your purchase, the feature will be enabled for your organization.
Step-by-Step Guide: Setting up SSO
Important:
SSO is configured once for your entire organization—not for each individual workspace. Once set up, it is available to all users across all workspaces within your meddevo organization.
1. Open App Management
- Click your username at the bottom left.
- Select "Apps" from the menu.
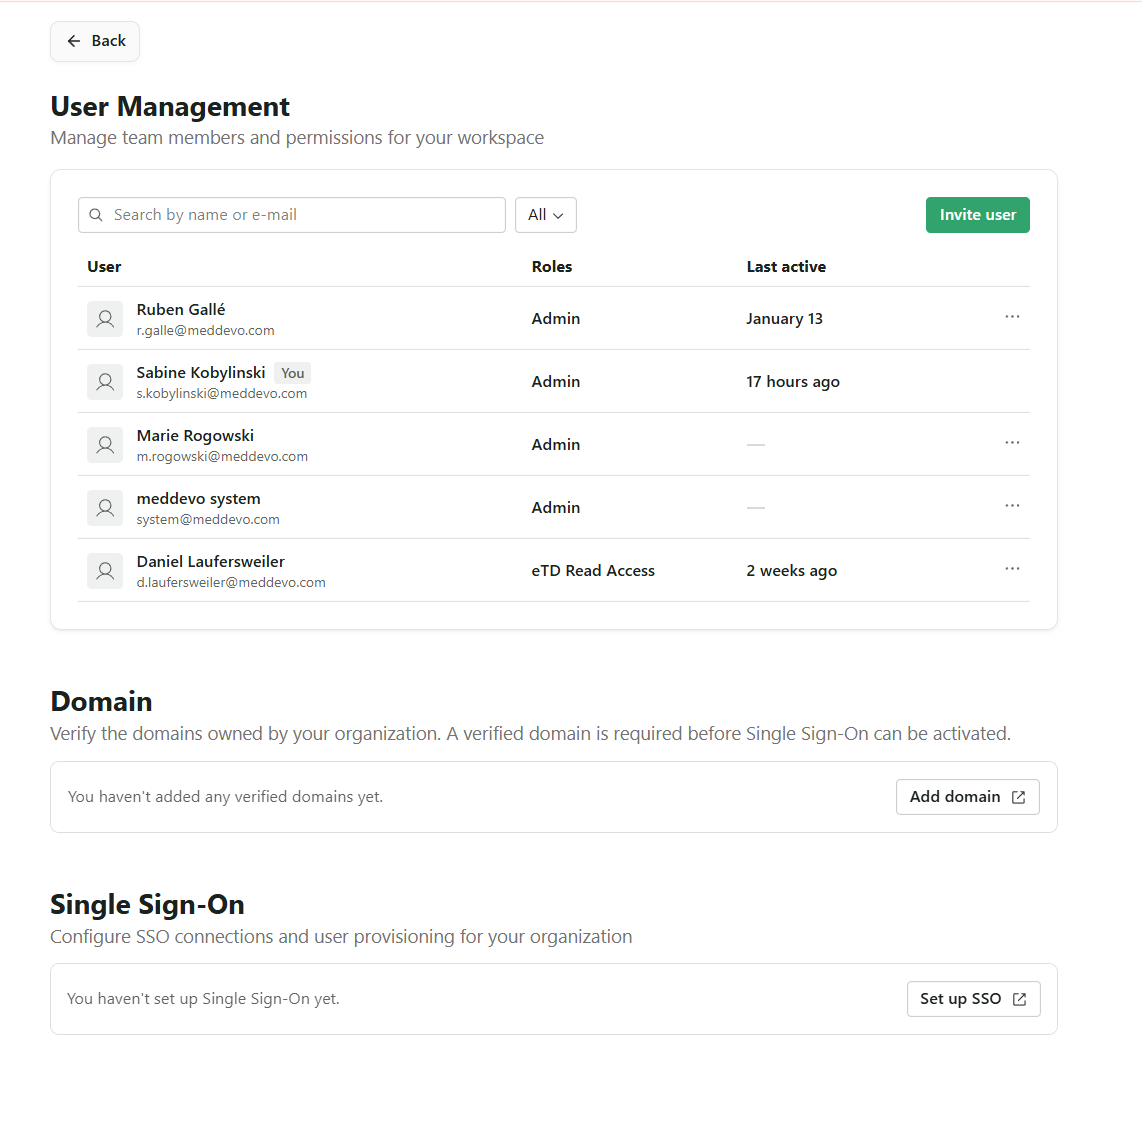
2. Open User Management
- In the app overview, click "User Management".
3. Access New Sections
- Once SSO has been enabled, you will see two new sections:
- Domain
- Single Sign-On
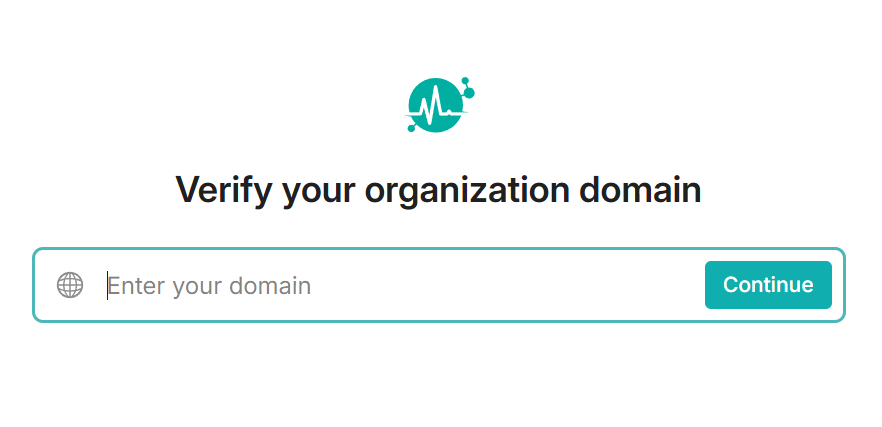
4. Add a Verified Domain
- Click "Add domain".
- Follow the instructions provided by WorkOS to verify your domain (usually via DNS entry or a verification email).
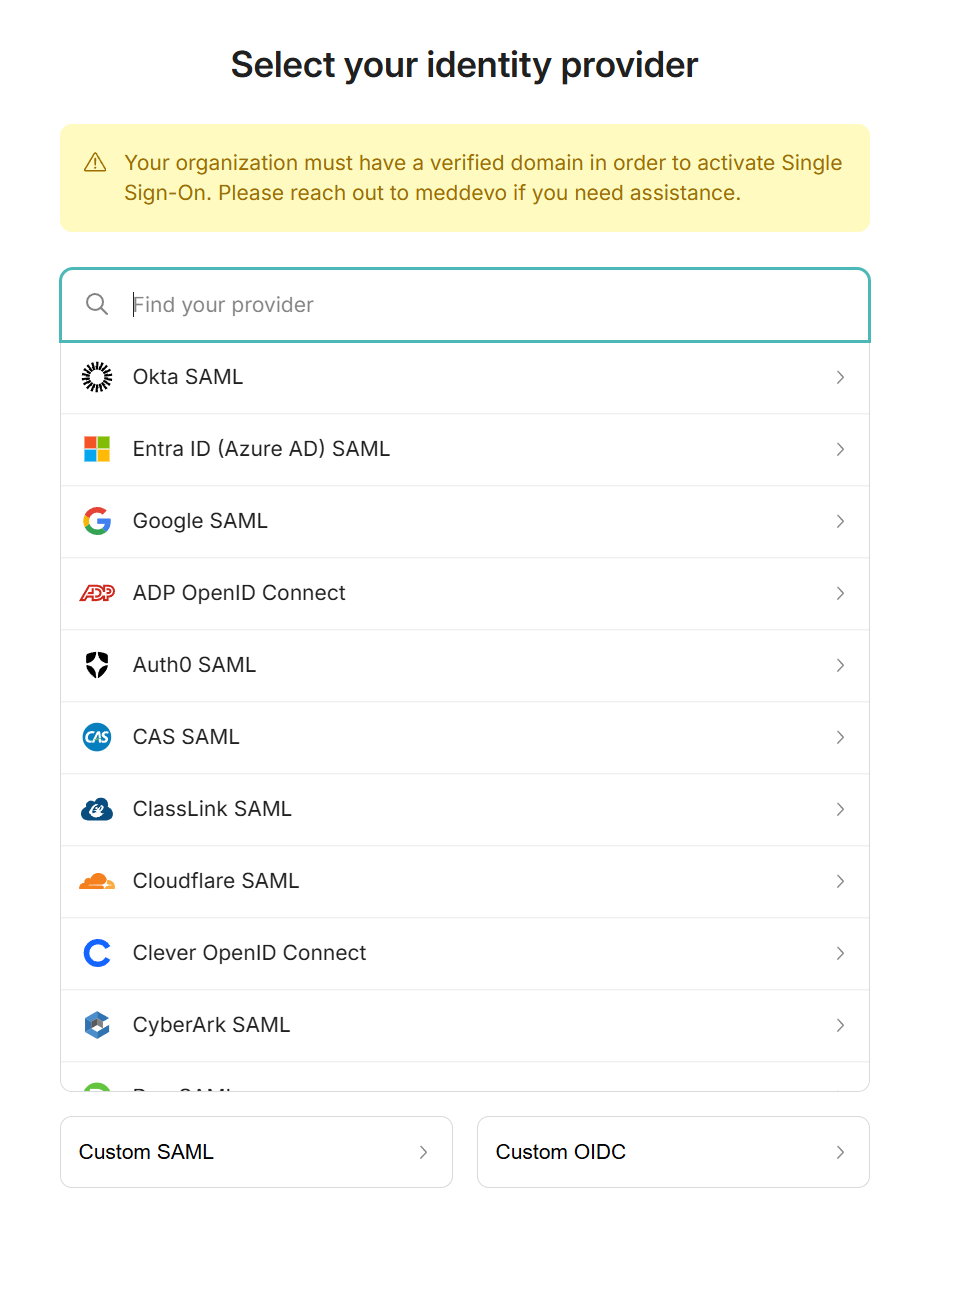
5. Set Up the SSO Provider
- After your domain is successfully verified, go to "Set up SSO".
- Select your SSO provider (e.g., Google, Microsoft, Okta).
- Follow the steps outlined by WorkOS to complete the SSO setup.
6. Log In with Corporate Account
- Once both sections (Domain & SSO) are successfully verified and set up, SSO will be available for all users in your organization.
- Users can now log in using their corporate account.
Tip: SSO setup requires administrative rights in your organization and may require changes to your company domain. Please consult your IT department if necessary.