Workflow Templates
Workflows & Company Roles - Function:
Admin - Workflow Management:
What are workflows?
Workflows are the backbone of your data and document control. You define who can review and who can approve entries. This can be defined once for all data and documents, but you can also create special cases for certain datapoints.
How to design a workflow:
In general you can create three types of workflow:
- A default workflow will be used on every collection/database and all types of entries
- A specific workflow set for one database will be used on only this and will overwrite the default
- A specific workflow set to one document type will be used on only this type and will overwrite the default and will overwrite the specific for one collection/database
Please make sure to not set a specific workflow as default! In this case, the system will not now how to handle all the other databases or document types.
Important note: For specific workflows, you can select either collections ordocument types. Choosing both collection and document types may lead to an error during the approval process.
Important considerations for your workflows
- The definitions with your workflow are not person-based but role-based. Therefore it might be important that you finalize your role management before starting on your workflows.
- Each workflow will consists of two parts: Approval and Withdrawal. You have to define both parts when setting up the workflow.
- For each workflow you will define which roles can start the workflow. You can pick one or several roles for this.
- In the approval workflow you can create as many steps as you want. Each step will be named by you - and it´s within your responsibility to define what each step means within your company. As a guideline: The meddevo default templates consists of the steps "review" and "approval".
- In the withdrawal workflow you can again create as many steps as you want. It is again within your responsibility to define the meaning of each step. The meddevo default again consists of "review of withdrawal" and "approval of withdrawal".
Workflows can only be edited, as long as they have not been used. Once the workflow was performed on an entry, the workflow can not be edited anymore, to ensure traceability. - If you want to use a different workflow, you can create a new one using the same scope as before. The system will inform you on any overlaps and your new workflow will replace the functionality of the older ones.
Important: Logic of Role Assignments and Step Sequencing
Please take into account the logic applied to assigning roles and accepting steps within the workflow:
- Roles entered in the same row are considered "either-or" required. This means users with any of the specified roles may perform the action called for in that step.
- Roles entered in different rows are considered "all" required, meaning that an acceptance/action from a user in each distinct role listed on separate rows is necessary.
- Roles (same row or different row) entered in one step, will be able to perform their action in parallel.
- Roles entered in several steps will be asked one after another to perform their actions.
For example:
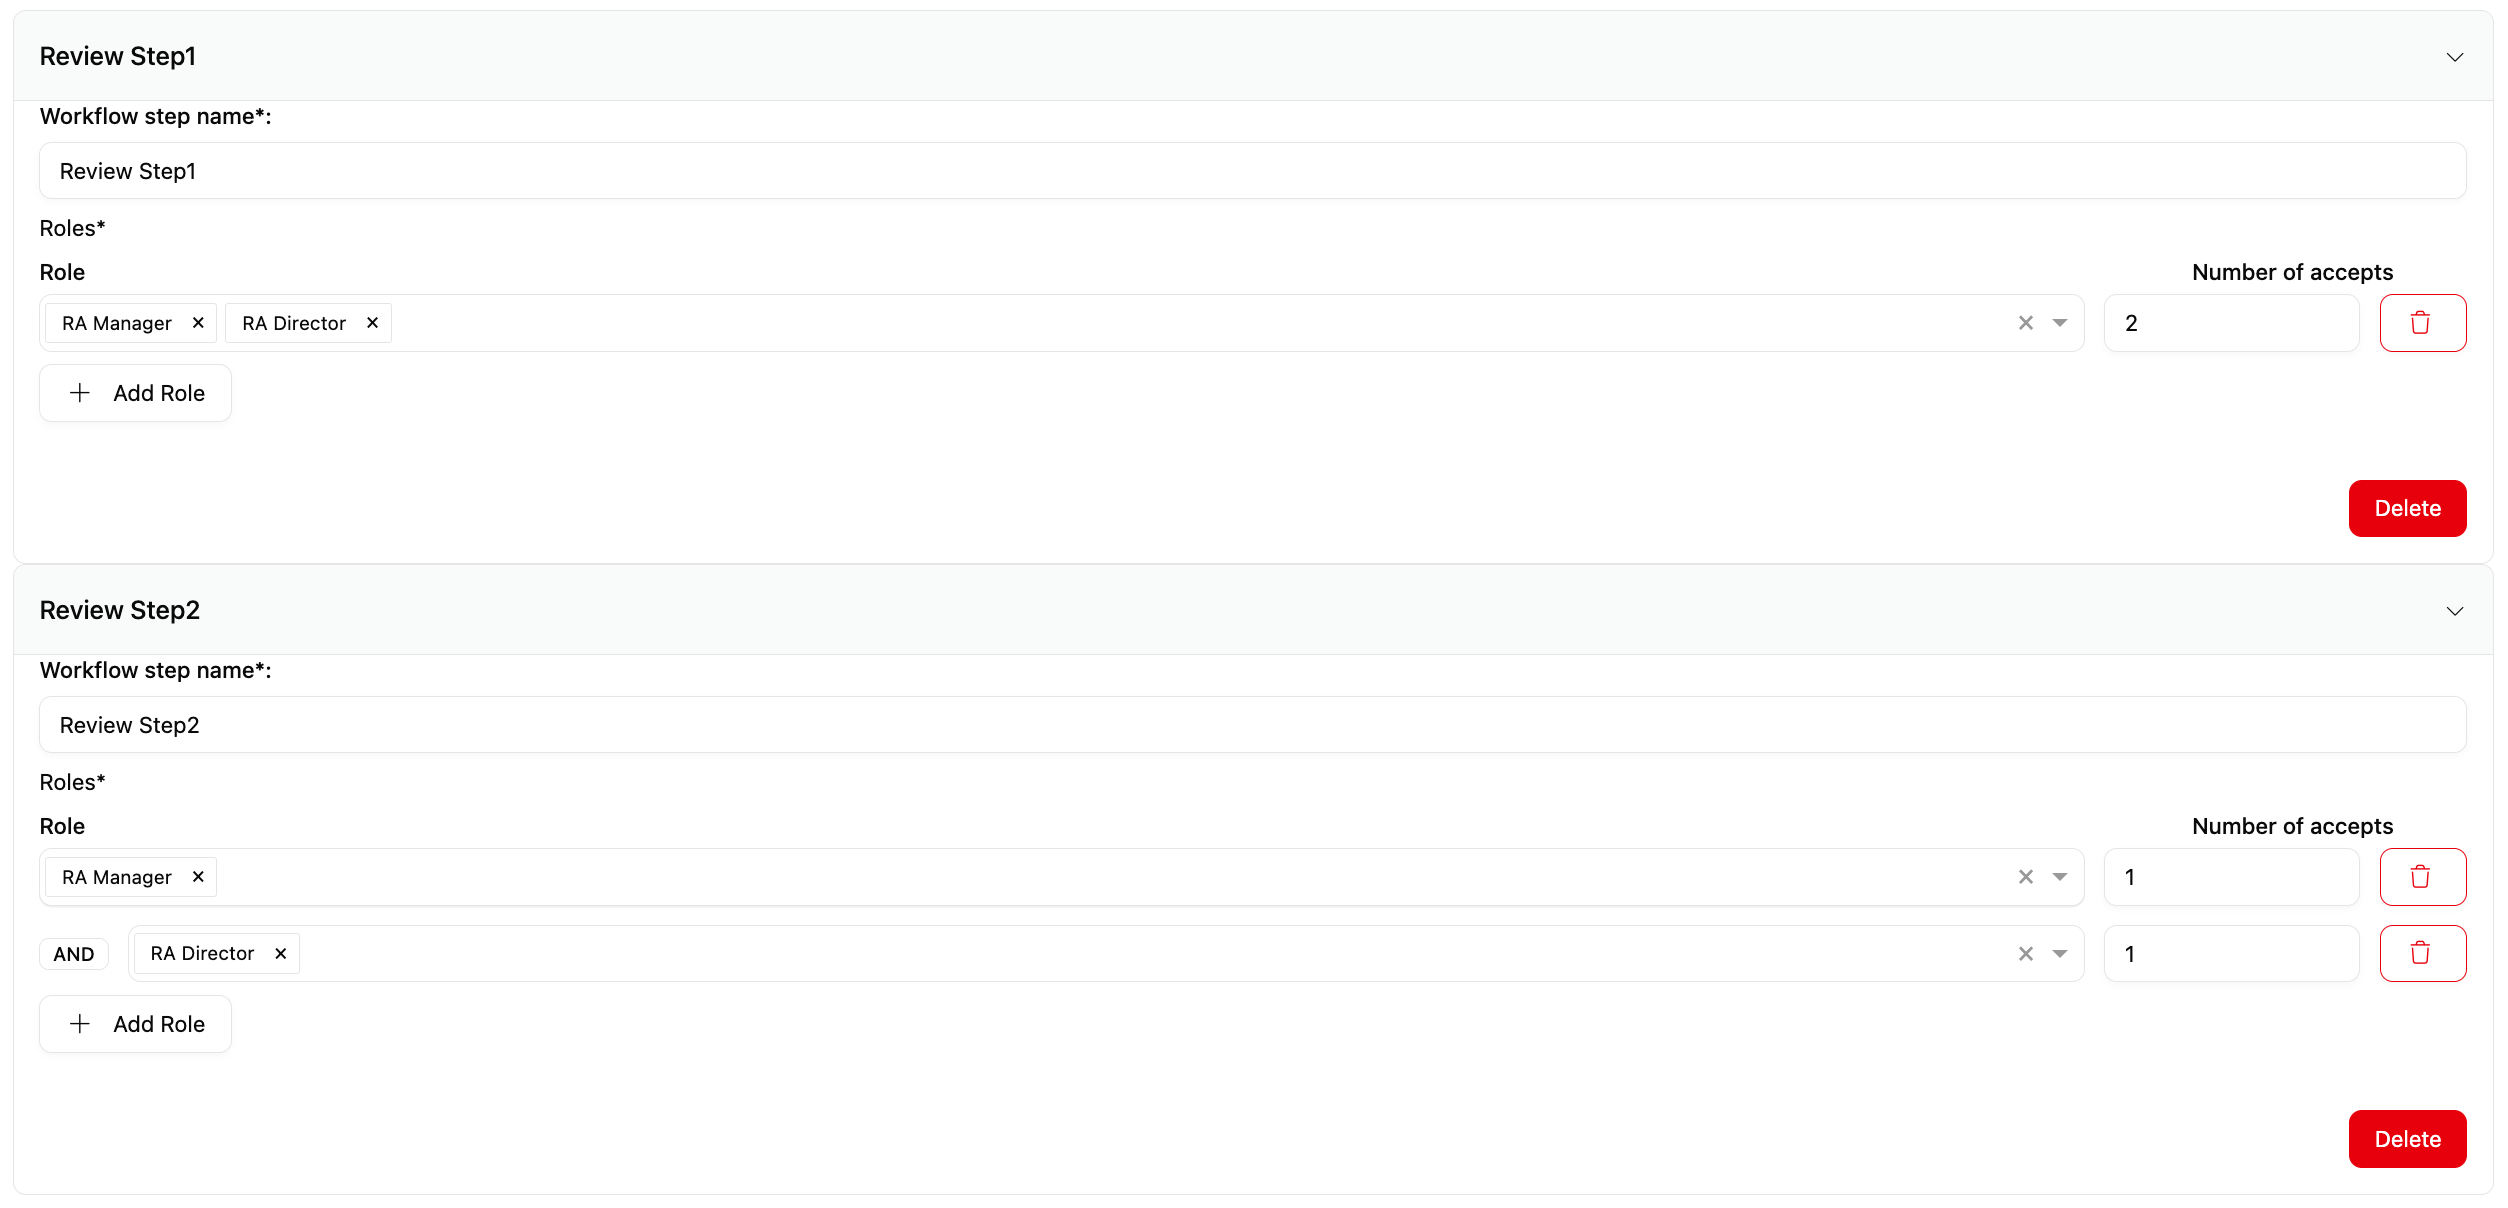
- If you design a workflow step with "RA Manager, RA Director" on the same row, and set the number of accepts to 2, it means that two users who are either RA Manager or RA Director can perform the step. The required actions may be performed by two RA Managers, two RA Directors, or one of each. (see configuration in screenshot below in Workflow step "Review Step1")
- If you design a workflow step with "RA Manager", number of accepts = 1 on one row, and "RA Director", number of accepts = 1 on a new row, it means that exactly one user with the role RA Manager and one user with the role RA Director must perform the step. If a user holds both roles, they can only participate once in that step and will be asked to select in which role they wish to act. (see configuration in screenshot below in Workflow step "Review Step1")
- When adding a new workflow step (as opposed to adding a role within a step), the next workflow step will only be triggered once the required number of accepts from the previous step have been given. Acceptances requested within one step may be performed in parallel, whereas acceptances required in two consecutive steps can only be completed sequentially. In such consecutive steps, the same user may perform actions in several steps if they hold multiple relevant roles, as long as they do not perform multiple accepts within a single parallel step. (see configuration in screenshot below: RA Manager and RA Director can perform Review Step1 simultaneously. Only once both accepts have been granted, the two accepts from Review Step2 can be performed)
Create a new workflow template:
Workflow templates can be found under Workflow Management in the Administration area. These templates are used for the workflow in specific collections. A default template is provided by meddevo and is used as default by all collections for the approval workflow. All newly created templates can be set as default.
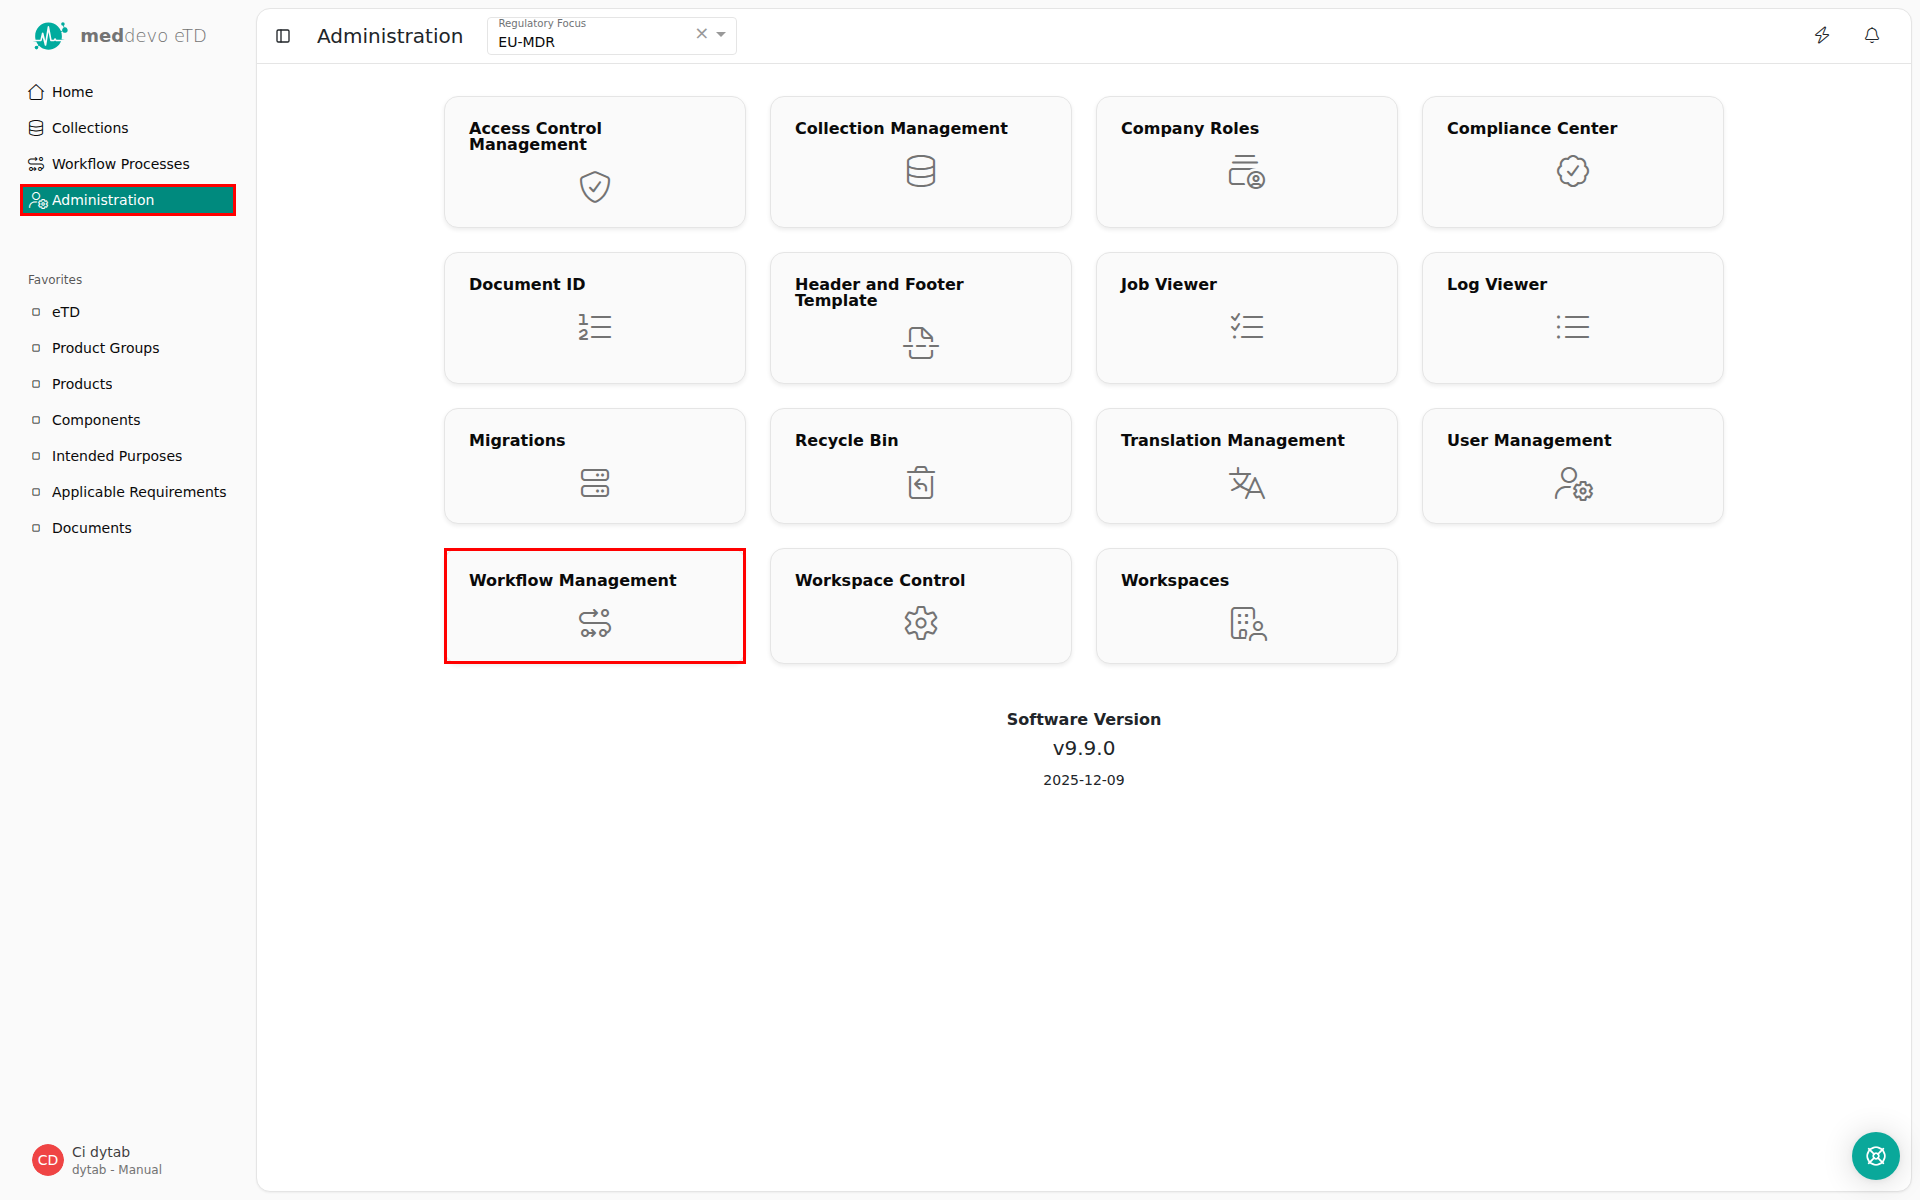
1. Navigate to the administration area (administration rights required)
2. Click on "Workflow Management"
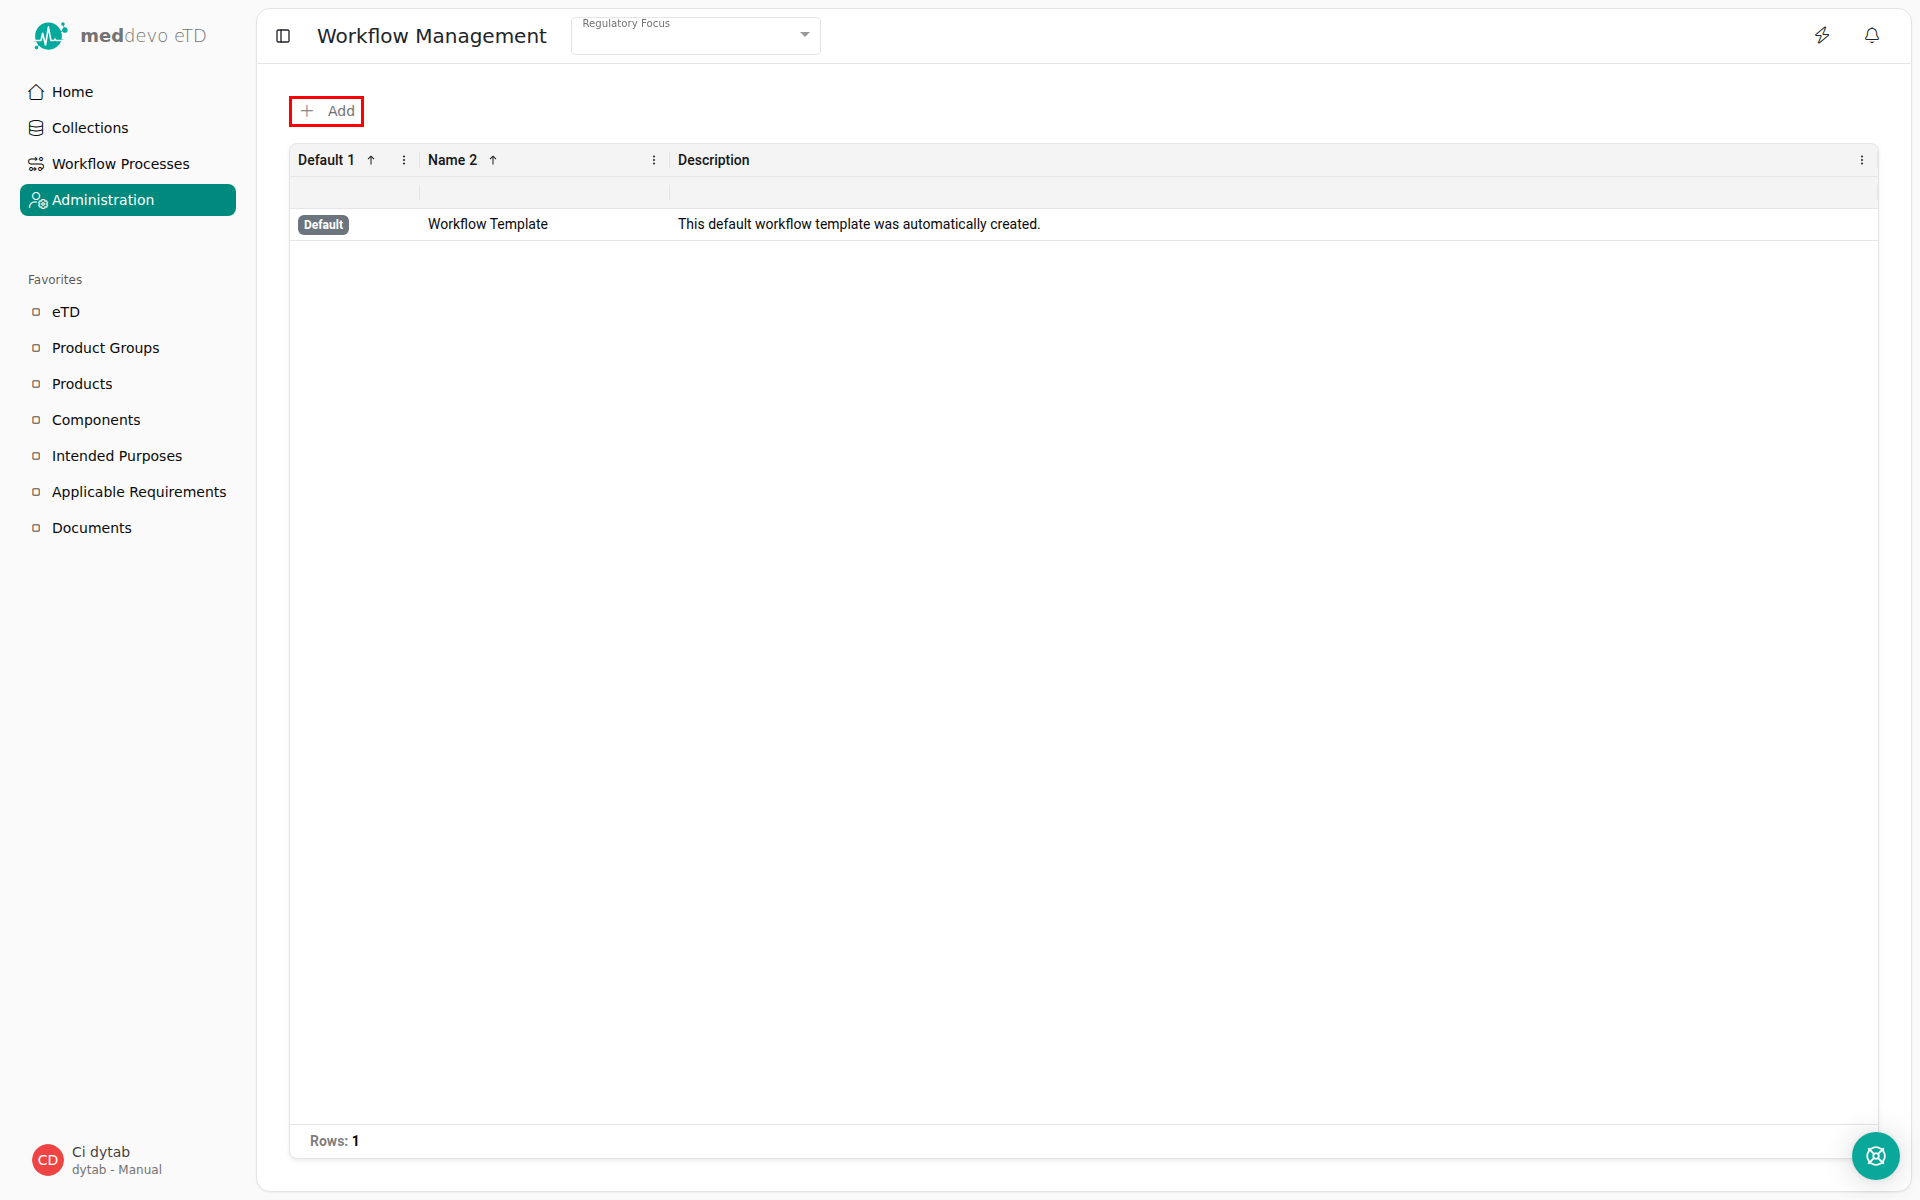
3. Click on "+ Add".
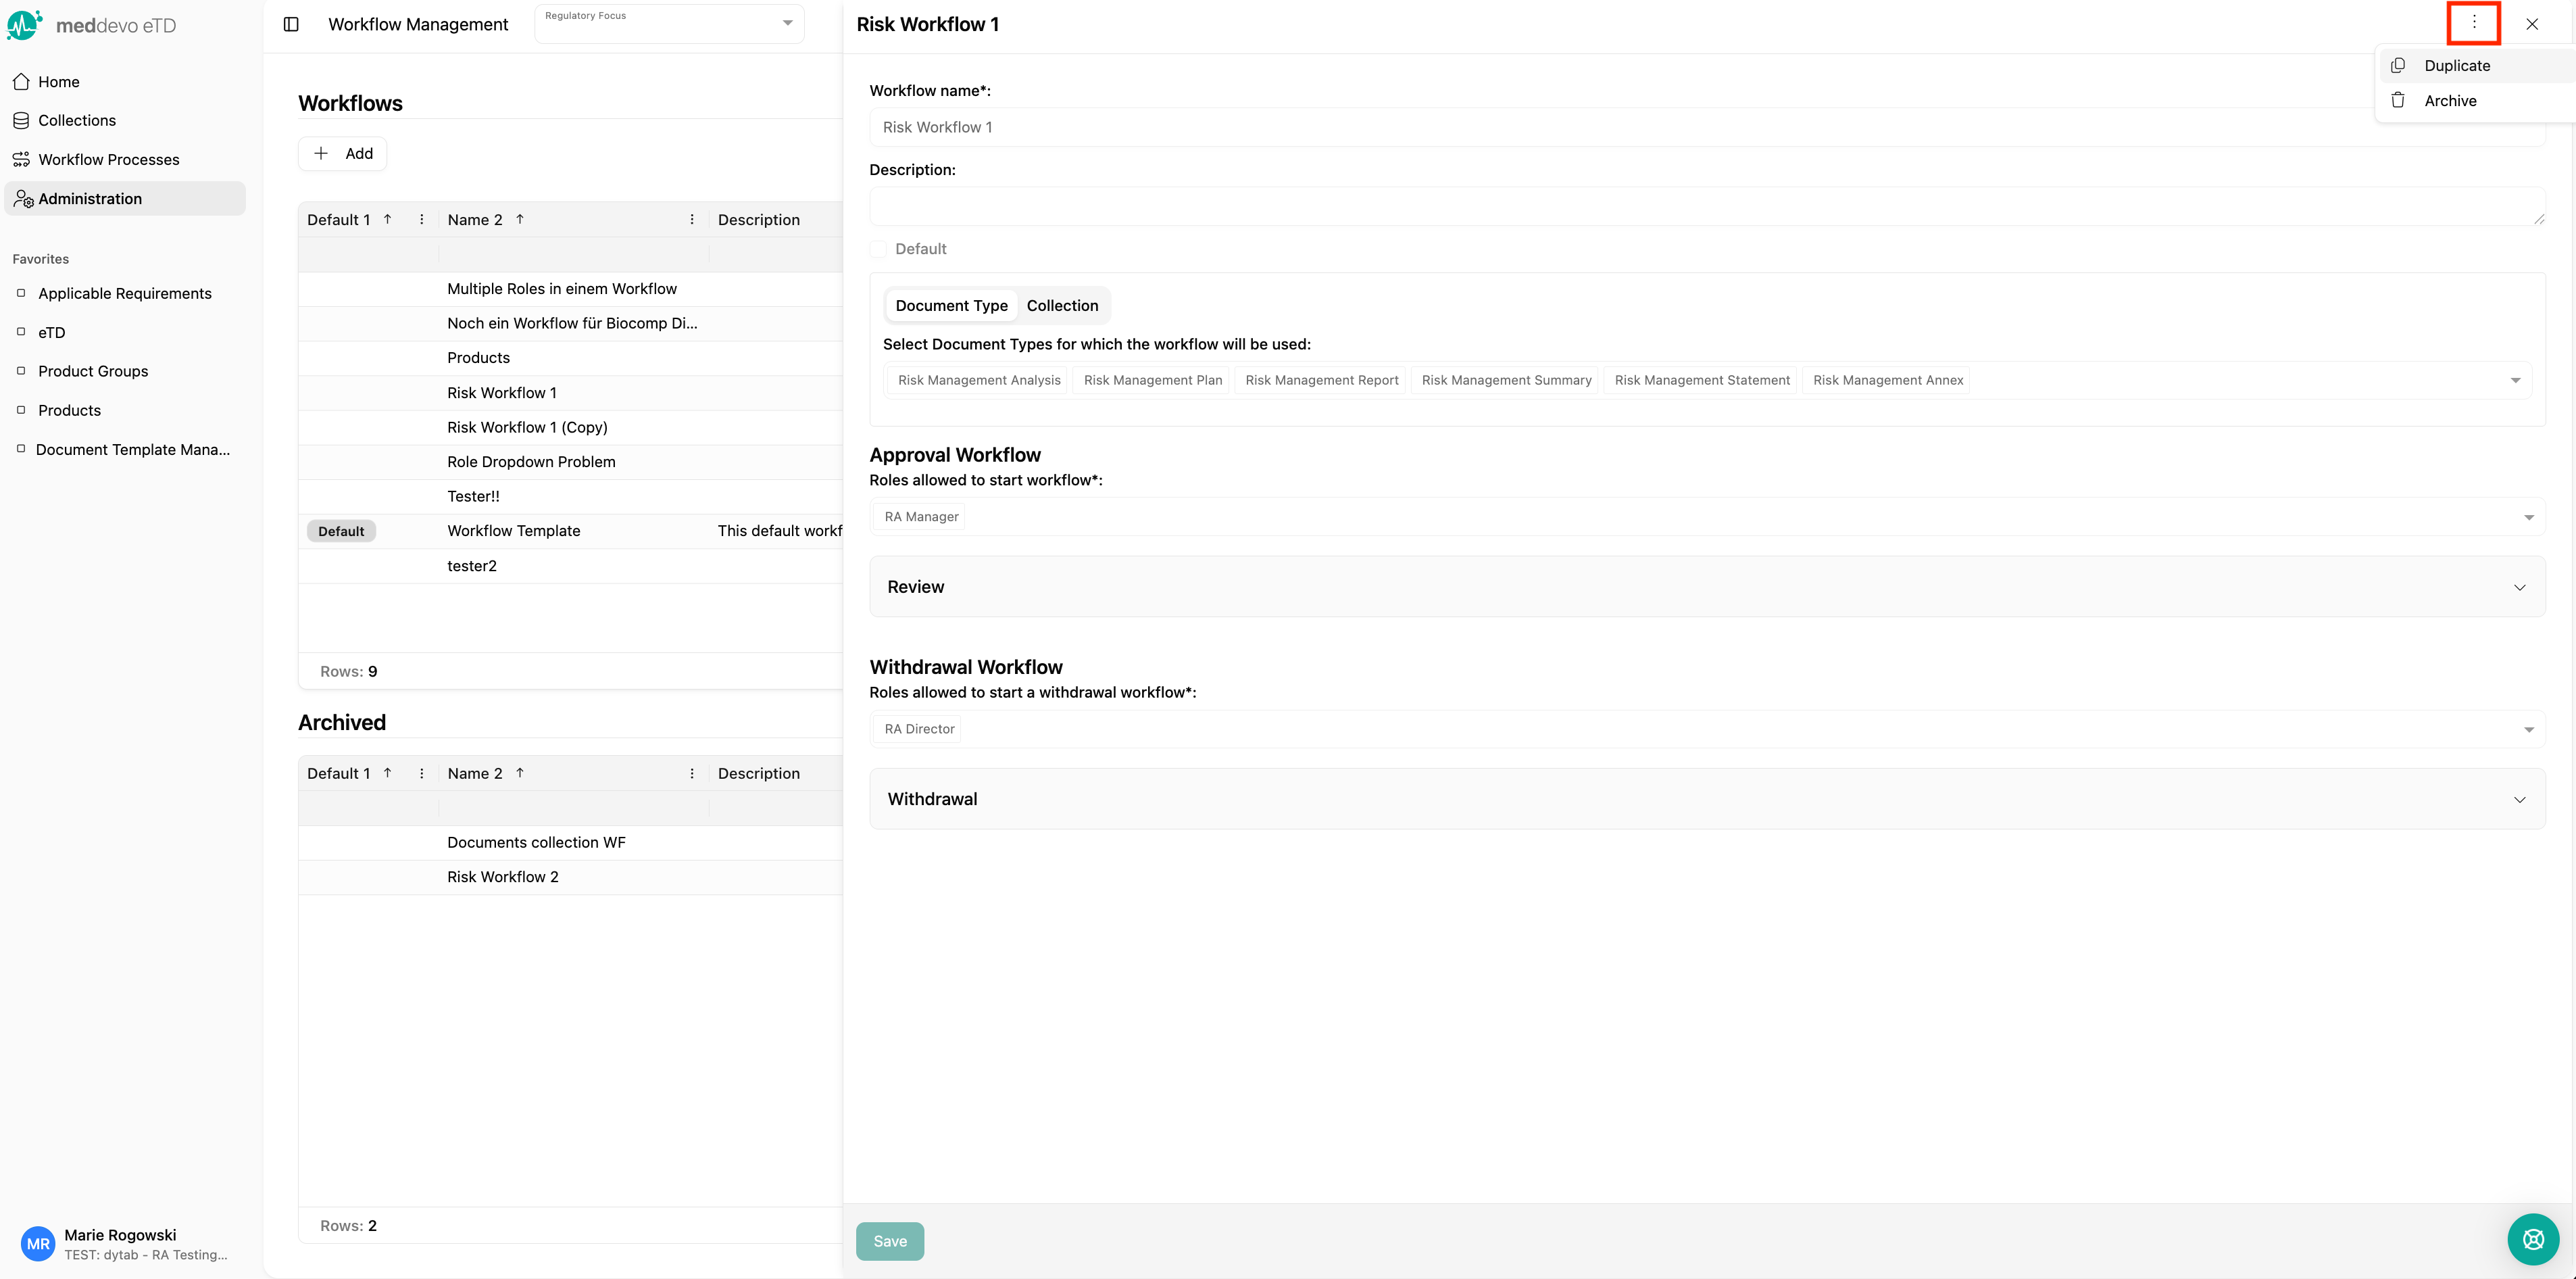
4. In the new overlay, fill in a name for the workflow. (1)
5. Select a collection the workflow template will be used for. The workflow will be used for all entries in the selected collections and each collection can only have one Workflow active at a time. (2)
6. Select a role that can start the workflow process. (3)
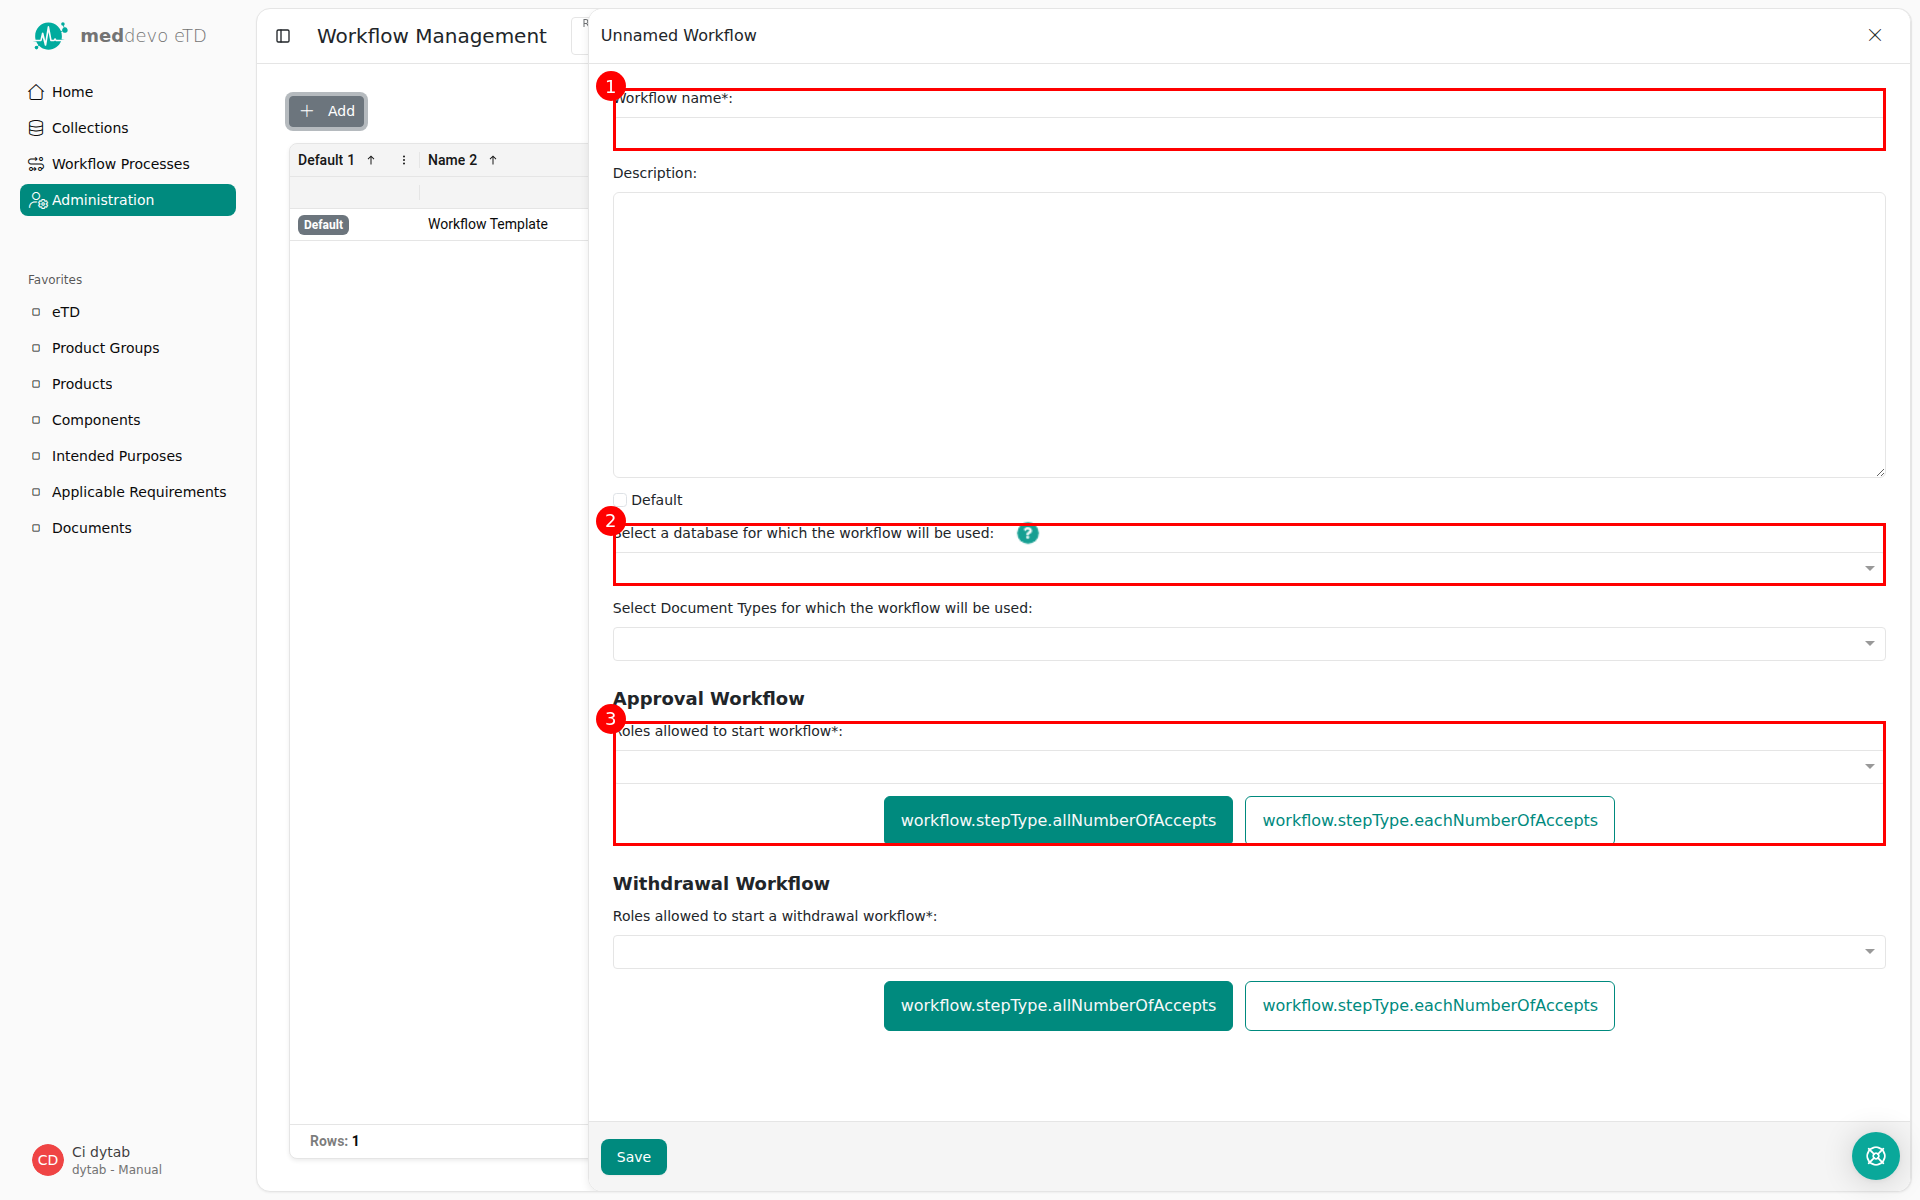
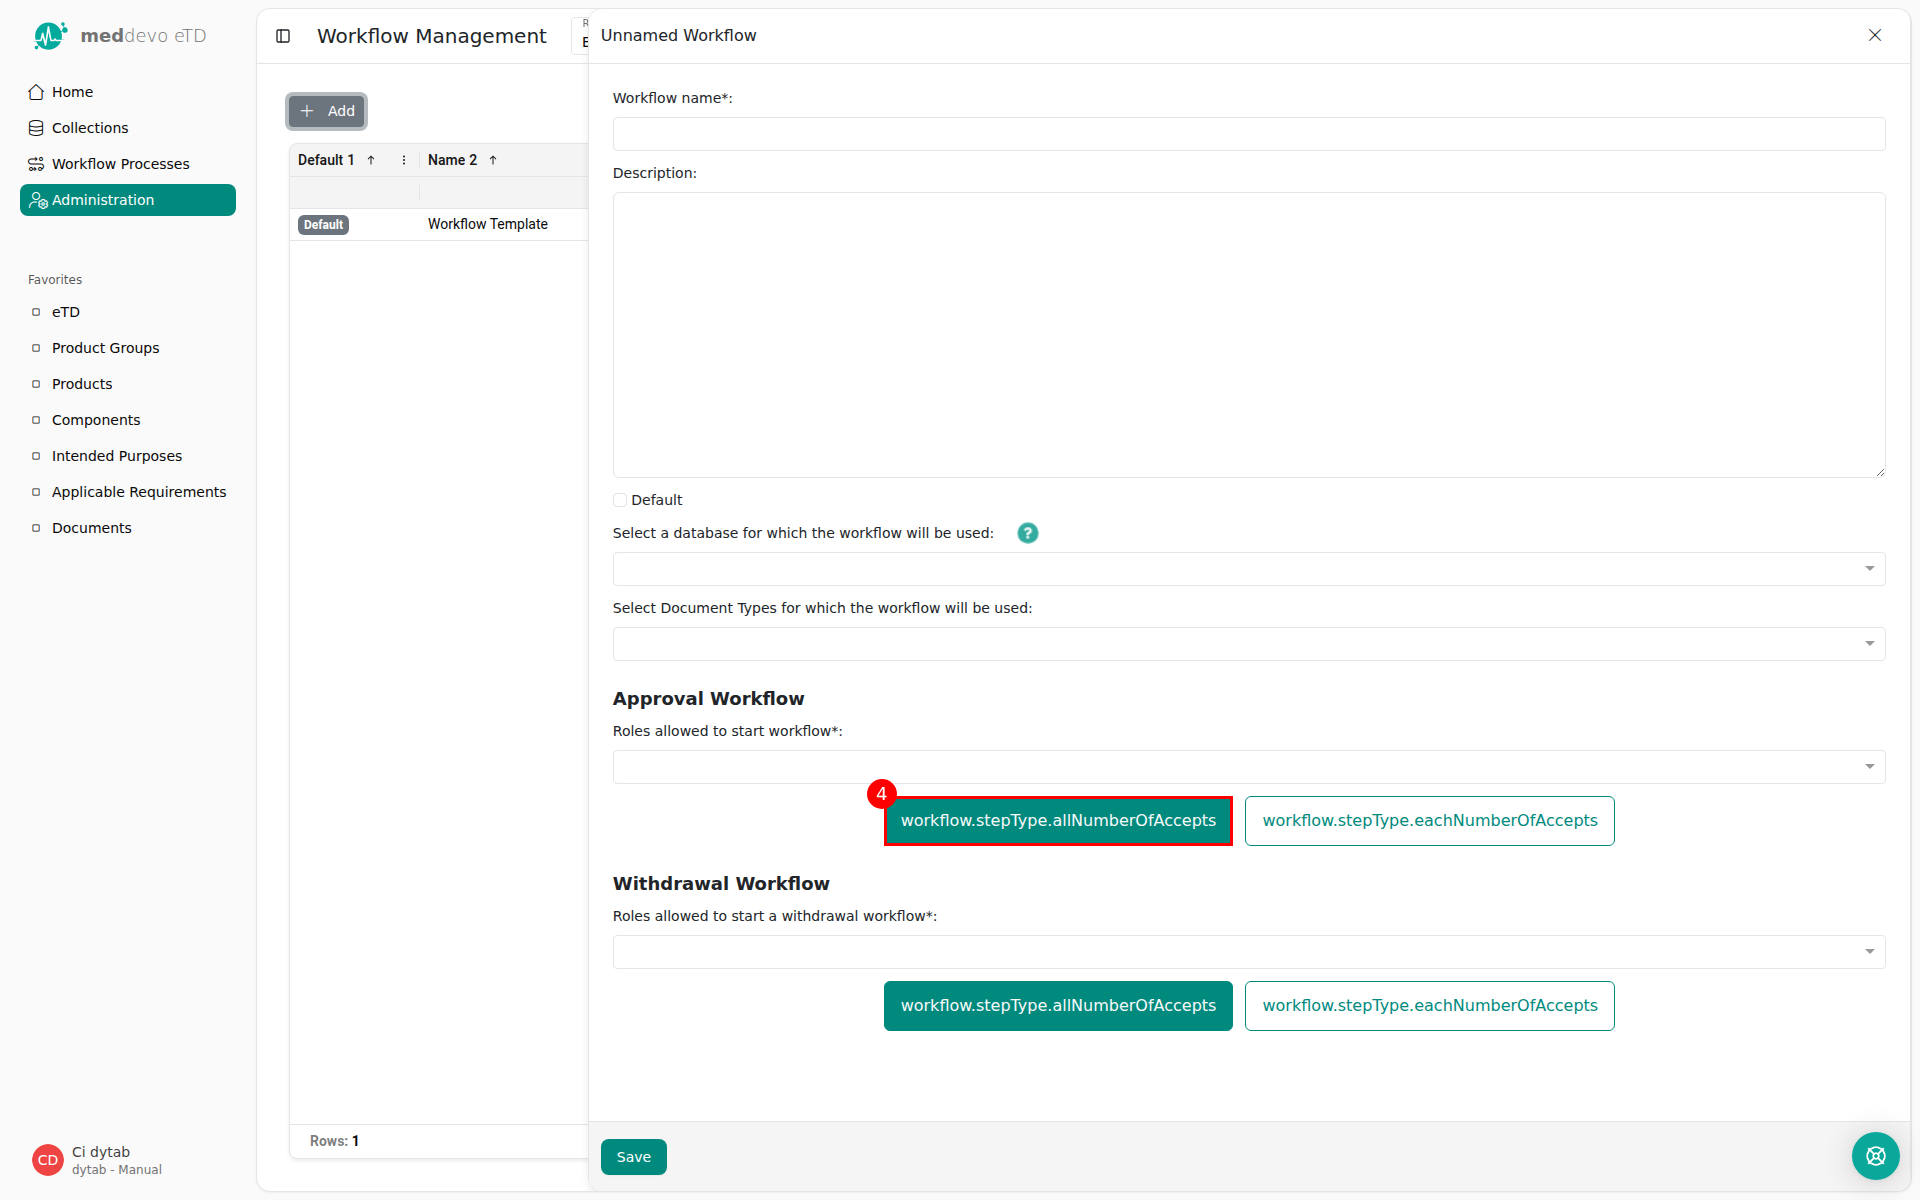
7. Click on "+ Add workflow step". (4)
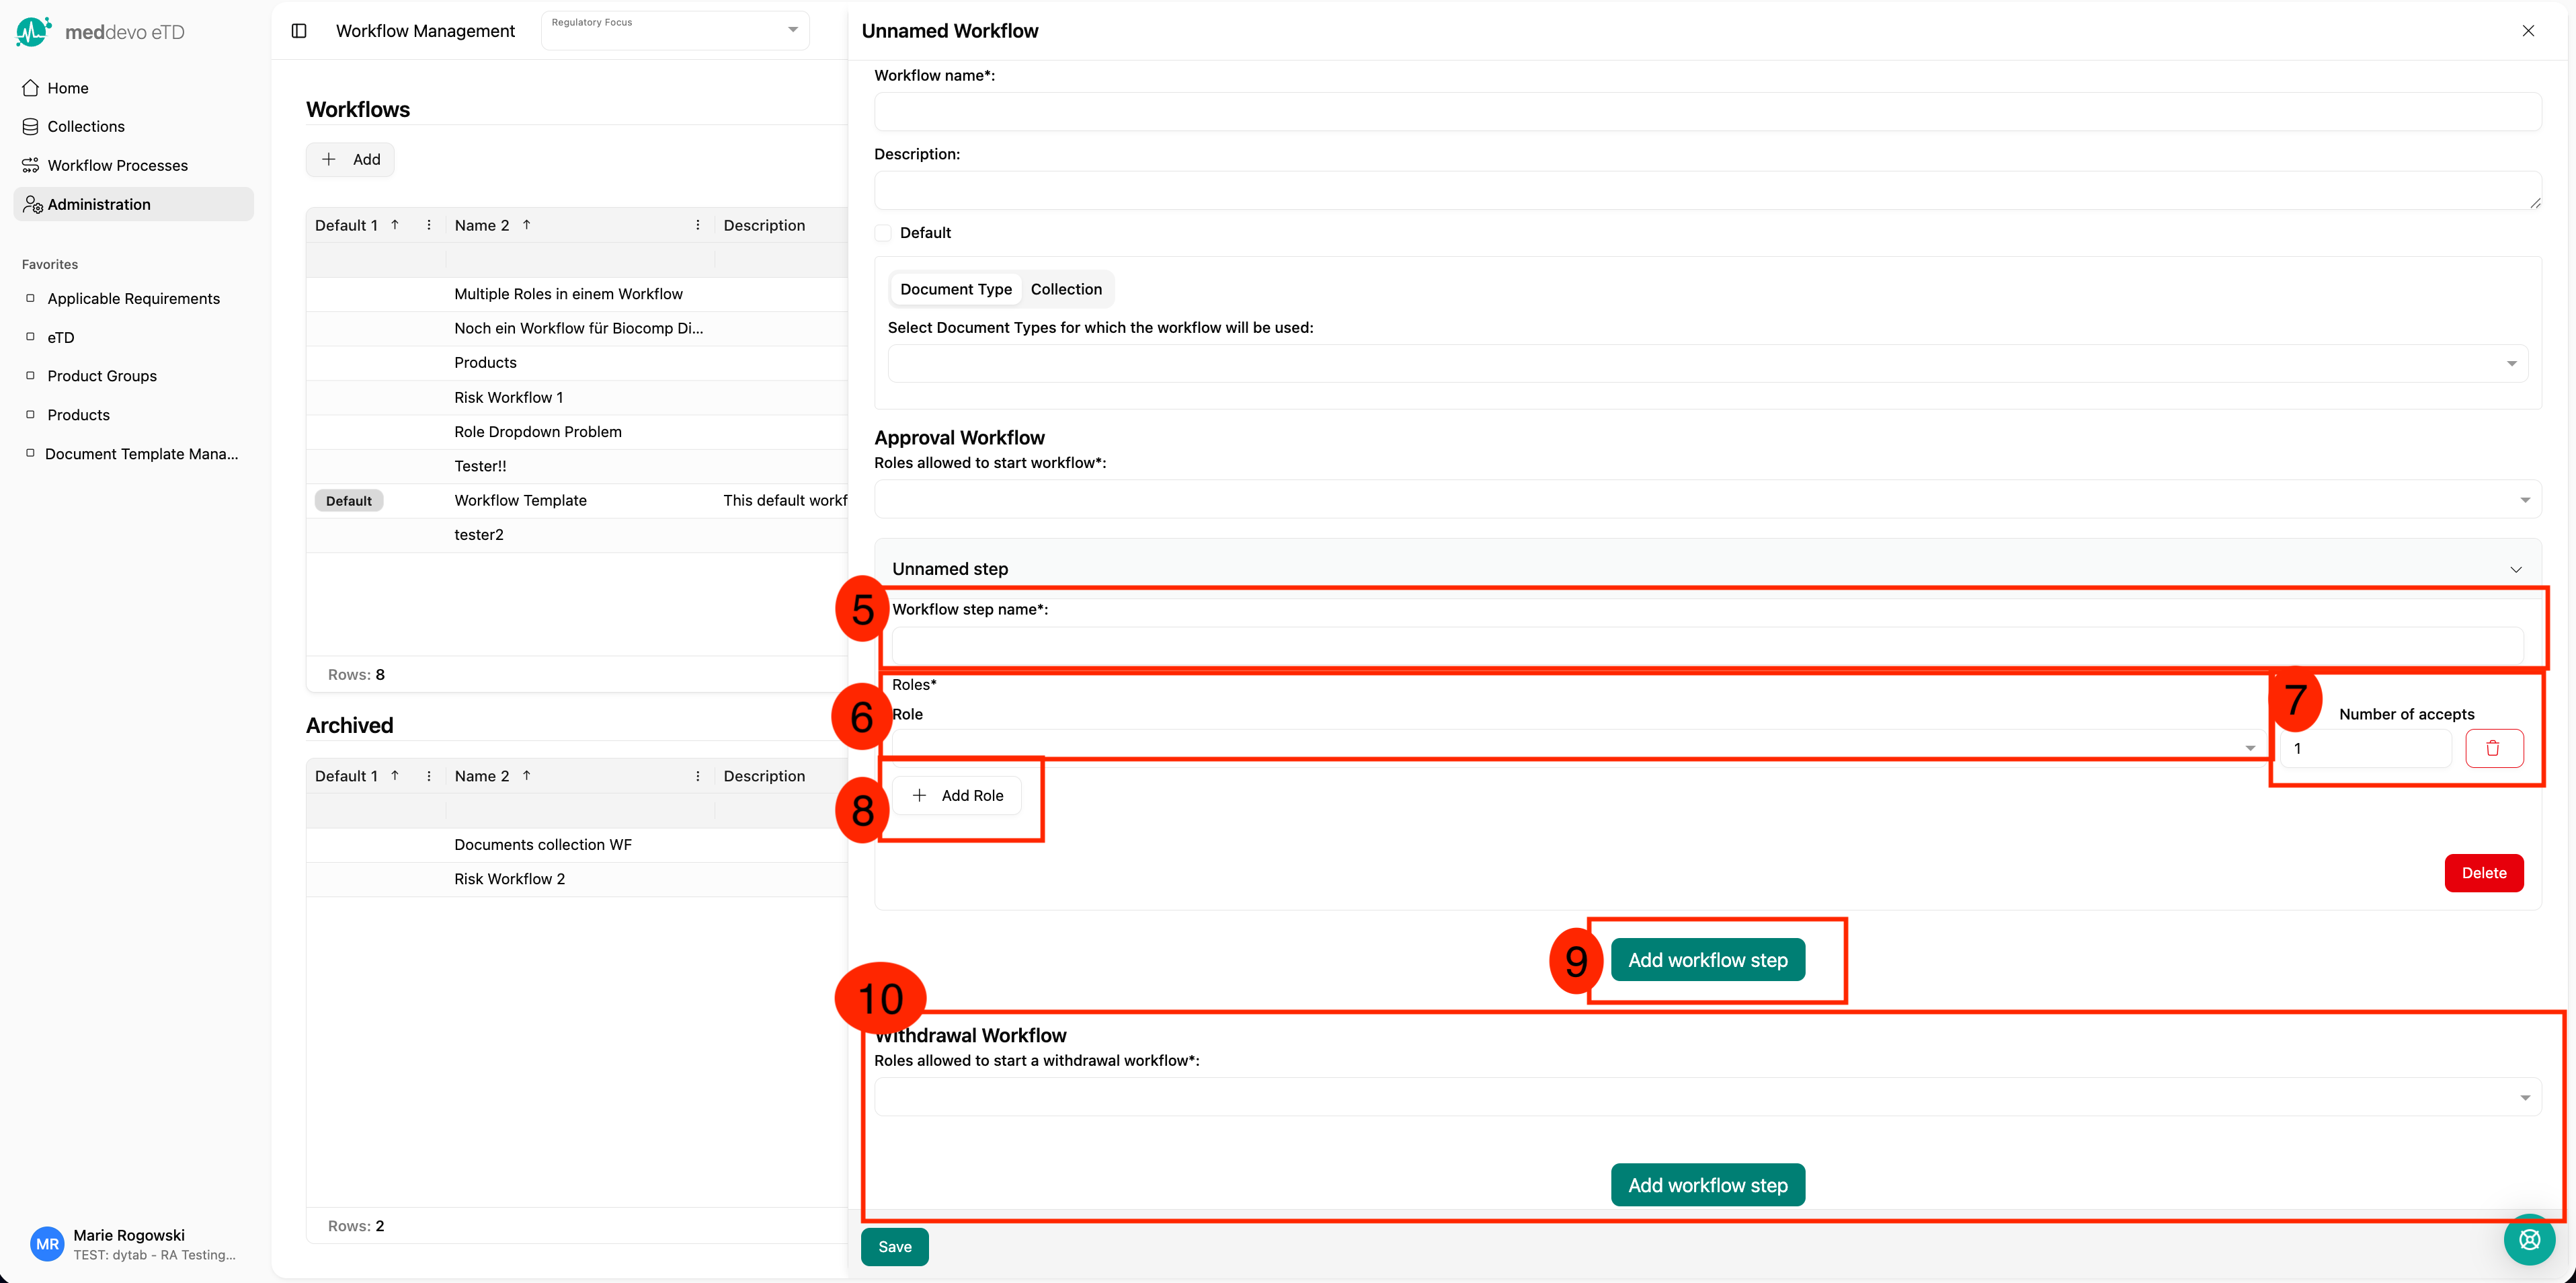
8. Fill in a name for the workflow step. (5)
9. Select a role that can contribute to this workflow step. (6)
10. Add a number of accepts that are required to finish this workflow step. (7)
11. If applicable, add more roles that shall also contribute in THE SAME workflow step (8)
12. If applicable, add more steps to the workflow (9)
13. Add a withdrawal workflow step in the same way you added the approval workflow step (at least one withdrawal step and one approval step is required for every workflow template).
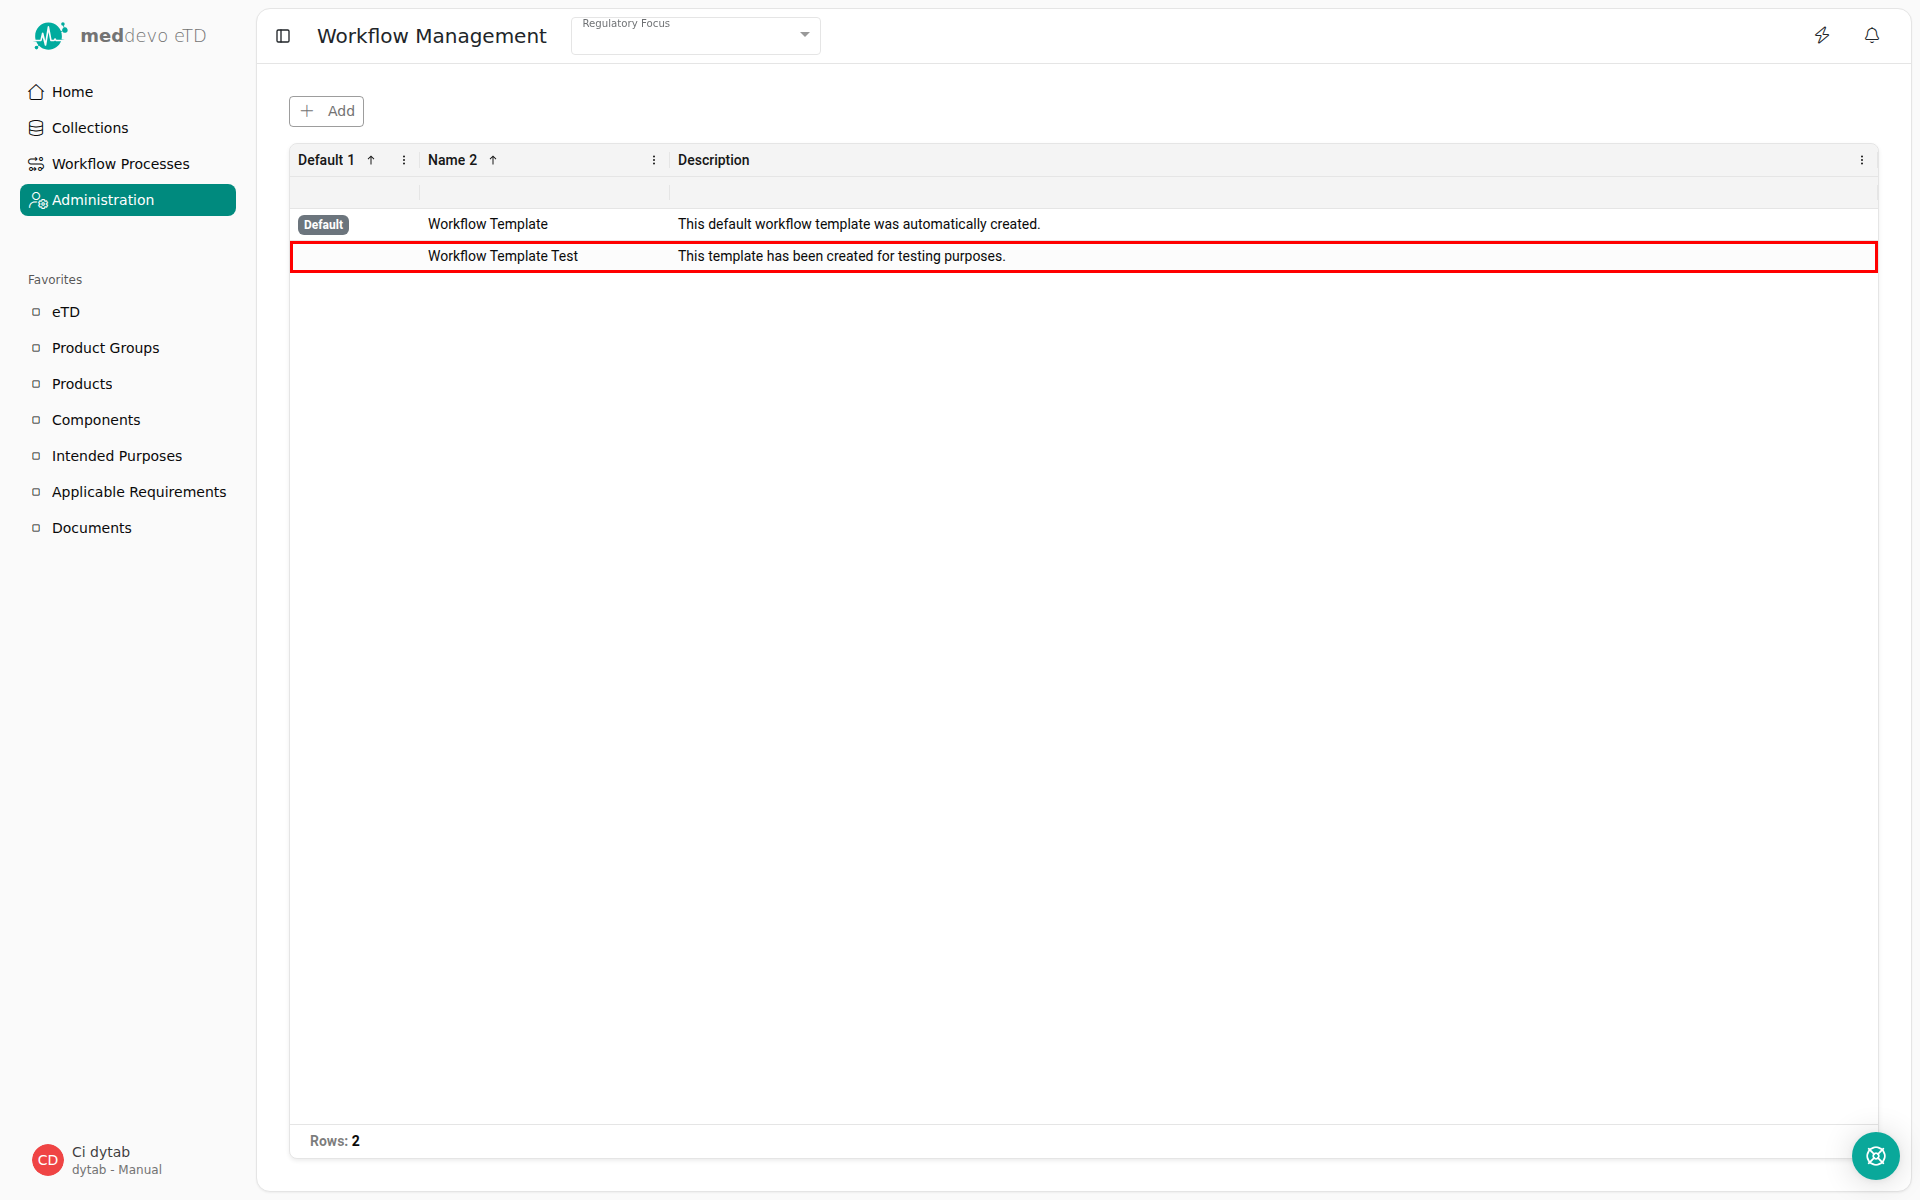
14. Click on "Save".
The created workflow template is now saved under "Workflow Management" and is shown in the collection overview.
Workflows can only be edited as long as they have not yet been used. Once the workflow has been executed for an entry, it can no longer be modified in order to ensure traceability.
Use the menu at the top right of a workflow to either duplicate or archive it. The option "archive" is not available if the workflow is currently in use. Wait for all workflows based on this template to be finished or cancel them, then the option to archive will be displayed again.